Appearance
Access
Orisha Commerce Platform uses Auth0 for authentication (verifying user and machine identities). Authorization (determining permissions) is managed within the Orisha Commerce Platform itself.
The following sections outline the steps to gain access to each application.
Admin portal
Create a user in Auth0
- Log in to the Auth0 management portal for the
orisha-commerce-platformtenant. - Navigate to the User Management module and create a new user.
- Log in to the Auth0 management portal for the
Assign a role
- Locate the newly created user and assign the
Orisha Commerce Platform Admin accessrole. - This grants the user permission to log into the Admin portal.
- Locate the newly created user and assign the
The user can now access the Admin portal
App
Create a user in Auth0
- Log in to the Auth0 management portal for the
orisha-commerce-platformtenant. - Navigate to the User Management module and create a new user.
- Copy and store the
user_idfor later use (it typically starts withauth0|...).
- Log in to the Auth0 management portal for the
Assign a role
- Locate the newly created user and assign the
Orisha Commerce Platform App accessrole. - This allows the user to log into the App.
- Locate the newly created user and assign the
Create a new identity in the Admin portal
- Log into the Admin portal.
- Navigate to the Identities module and create a new user identity.
- Use the copied
user_idfrom Auth0 as the identifier. - Assign the appropriate administrations to the identity.
The user can now access the App
API
Setup
Create a new application in Auth0
- Log in to the Auth0 management portal for the
orisha-commerce-platformtenant. - Navigate to the Applications module and create a new application.
- Copy and store the Client ID for later use.
- Log in to the Auth0 management portal for the
Authorize the API
- Locate the newly created application and authorize
Orisha Commerce Platform APIunder the APIs tab.
- Locate the newly created application and authorize
Create a new identity in the Admin portal
- Log into the Admin portal.
- Navigate to the Identities module and create a new application identity.
- Use the copied Client ID from Auth0 as the identifier, appending
@clientsto it.- Example: If the Client ID is
3KqAm3tLnJeiK94MMlqAar, the identifier should be3KqAm3tLnJeiK94MMlqAar@clients.
- Example: If the Client ID is
- Assign the appropriate administrations to the identity.
The machine can now generate access tokens
Generate access token and perform requests
Before generating access tokens, ensure that Auth0 is properly configured to issue them.
Retrieve the Client ID and Secret
- Log in to the Auth0 management portal for the
orisha-commerce-platformtenant. - Navigate to the correct application under the Applications module.
- Copy and store the Client ID and Client Secret for later use.
- Log in to the Auth0 management portal for the
Generate an access token
Perform a client credentials exchange to obtain an access token:
shcurl --request POST \ --url https://auth.core-suite.io/oauth/token \ --header 'content-type: application/json' \ --data '{ "client_id": "[CLIENT_ID]", "client_secret": "[SECRET]", "audience": "https://ocp-publicapi.core-suite.io/", "grant_type": "client_credentials" }'Response:
json{ "access_token": "...", "token_type": "Bearer" }Perform API requests
Use the access token to make authorized requests to the API:
shcurl --request POST \ --url https://publicapi-ocp-acc.core-suite.io/alpha/auth/me \ --header 'authorization: Bearer [ACCESS_TOKEN]'Response:
json{ "identifier": "....@clients", "name": "Orisha Commerce Platform - Customer XYZ", "type": "Application", "administrations": [ { "code": "customer-xyz", "name": "Customer XYZ" } ] }
Postman Setup
You can import the Orisha Commerce Platform API into Postman using the OpenAPI specification. This setup is designed for machine-to-machine (M2M) authentication and requires the client ID and client secret from your Auth0 application.
Import the API specification
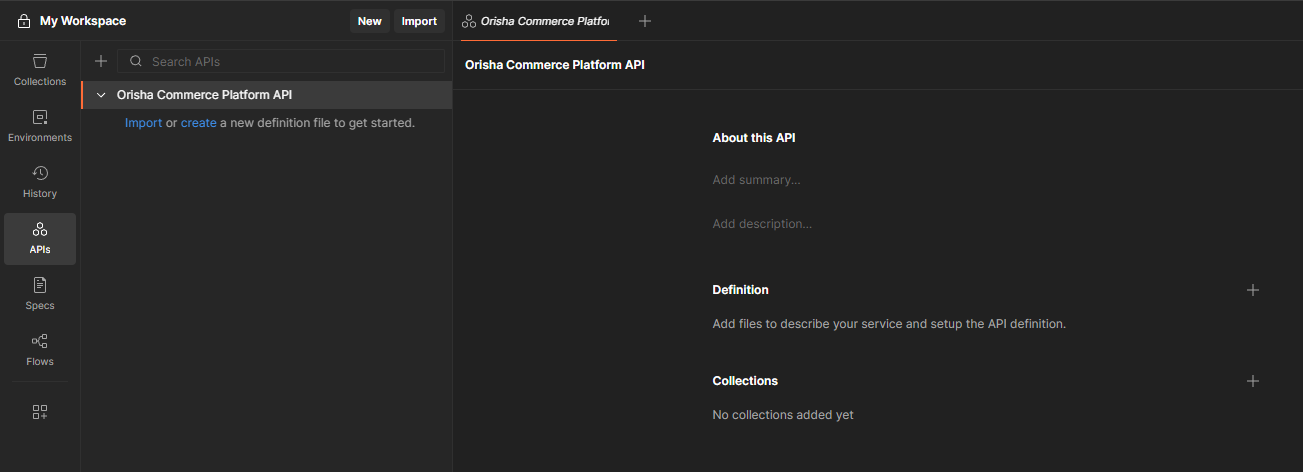
- Open Postman and navigate to the APIs section in the sidebar.
If the APIs section isn't visible, you can enable it by right-clicking the sidebar > Configure sidebar > Settings > Toggle APIs on.
- Click Create new API (+), optionally give it a name, and then click the newly created API to select it.
Creating a collection via the API section in Postman allows you to update the collection later if there are changes to the API specification. This can be done manually by removing and re-adding the API definition.
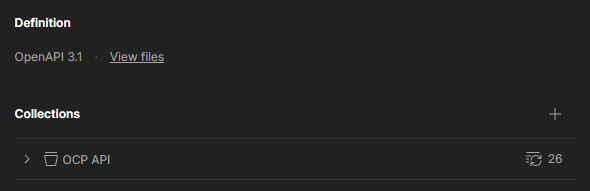
In the overview for your newly created API, next to Definition, click Select a definition (+) > Import files.
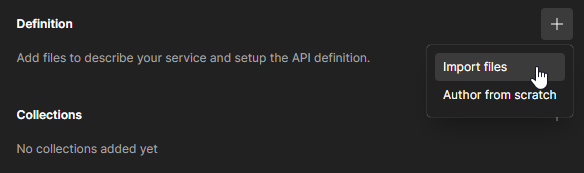
In the popup window, enter the following OpenAPI specification URL:
https://publicapi-ocp-prd.core-suite.io/openapi/v1.json. This will create a definition under the API.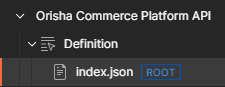
In the same overview, next to Collections, click Add a collection (+) > Generate from definition.
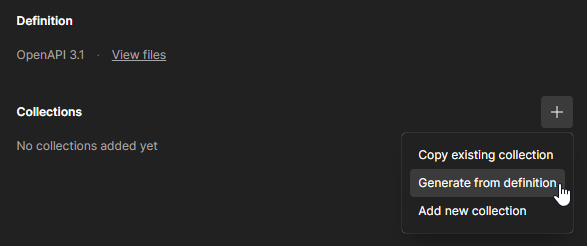
Give the collection a name, and under Settings, configure the following organization settings:
- Set Folder organization to Tags
- Enable Nested folder organization using tags.
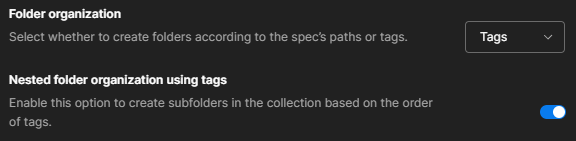
These organization settings ensure that API endpoints are properly nested into folders, and future re-imports will maintain this structure.
Click Generate Collection. You should now have a collection based on our API specification. Click Update collection next to the collection if needed.
Set up environment variables
For your convenience, we have set up a Postman environment with predefined variables.
- In Postman, click Import to open the import window.

- Copy and paste this URL into the import window, which will import the environment.
This environment contains the required variables for API requests, with some values prefilled for your convenience.
Navigate to the imported environment and add values for the following variables:
clientId- Your Auth0 application's Client ID.clientSecret- Your Auth0 application's Client Secret.apiKey- The administration code of your environment.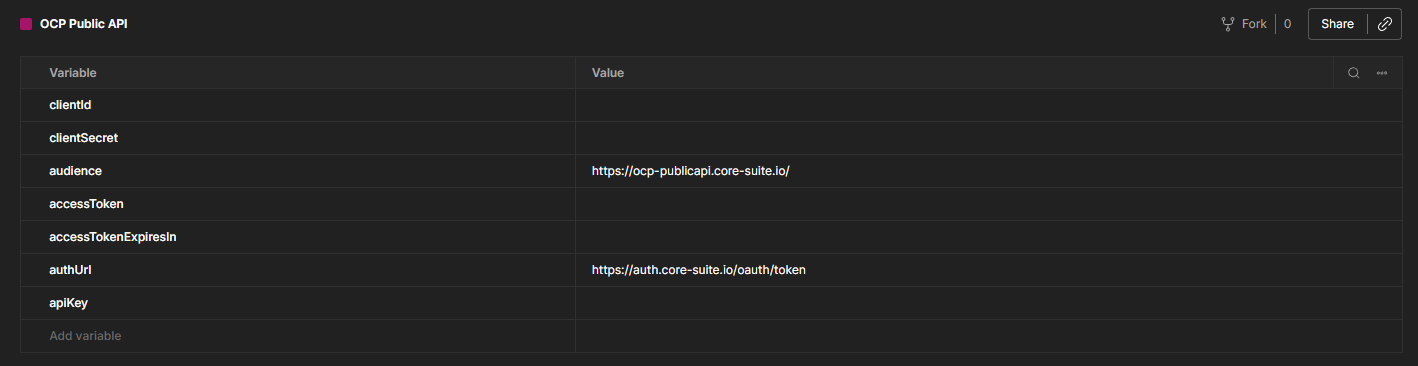
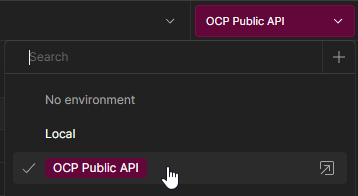
In the top right of the Postman window, select the newly imported environment from the dropdown. This allows the variables to be used for API requests.
- In Postman, click Import to open the import window.
Add authentication via pre-request script
To automatically handle authentication for all requests:
- Navigate to the APIs section, click the API you previously created, and then select the generated collection.
- When you select the collection, an overview page will open with various tabs. Navigate to the Scripts tab and select Pre-request.

- Copy the contents of postman-pre-request-script.js, paste it into the script editor, and save your changes.
This script automatically handles OAuth2 token generation, renewal, and adds the Bearer token to your requests.
Test the setup
Once configured, you can test any endpoint from the imported collection.